Blog
Create a grindhouse-inspired background with the Microscopic Fingerprint texture set
A note from the editor
Dustin is someone I’m super pumped to finally have writing for the Zine, and as an Arsenal contributor. As a designer, his countless free texture contributions to Lost and Taken, Bittbox, and his own site, Valleys in the Vinyl, have made my life so much easier. The pack of 15 textures he created for us is simply amazing, unique, and beautiful. These images could stand as poster in their own right. You should totally check the pack out on the Arsenal, and purchase it. Here’s a quick preview of what you’ll get when purchasing the pack:


On that note, I’ll pass him the microphone again!
— Simon, Manager for Go Media’s Arsenal
__________________________________________________________
Most digital artists can readily admit that texture building and other manipulation techniques are not exact sciences. The pure spontaneous bursts of clarity and inspiration make this work so much fun. Today I’ll be walking you through a breakdown of this grindhouse-inspired texture build. We’ll be using some of the images from my newly released Microscopic Fingerprints set over at the Go Media Arsenal, along with some textures taken from my texture resource site Valleys in the Vinyl.
Something to bear in mind with this kind of tutorial is that the finished piece almost never happens in clear, concise steps like this. Your composition is a revolving door of different images, with the layers moving around like deck of cards being shuffled. Here you can see how the finished image is constructed and get a glance at how the different images build upon one another. You may not be allowed to see the missteps and outcasts from this piece’s creation, but at least you can get a glimpse at how these image elements interact to form a finished design.
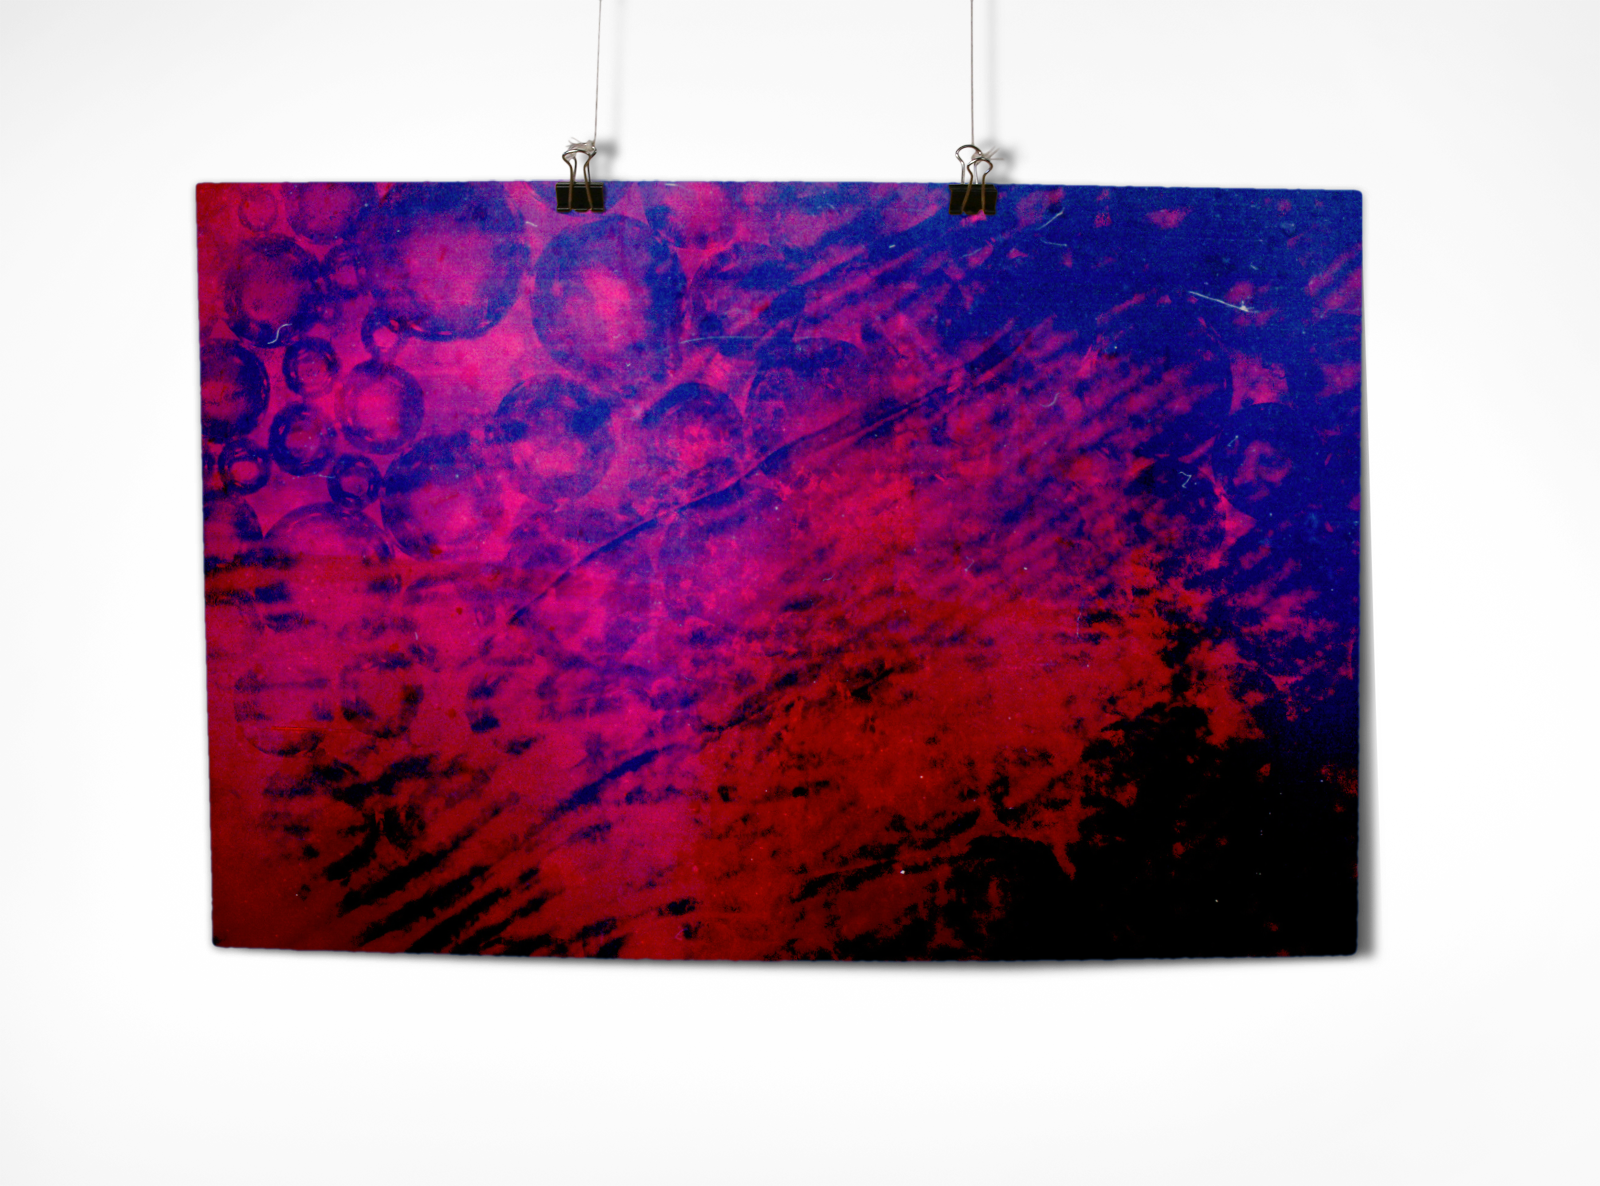
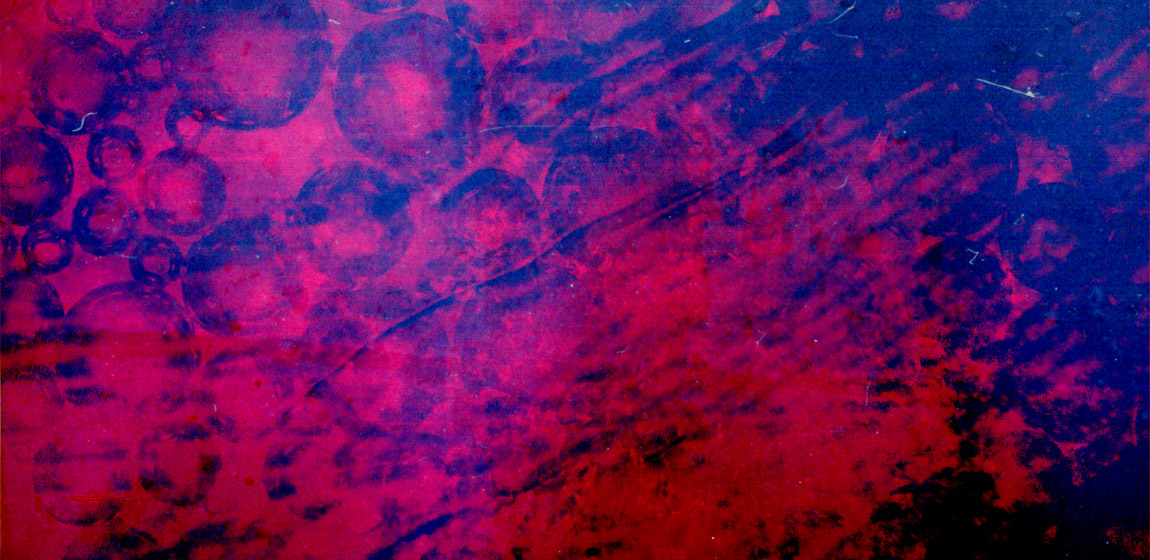
Here’s what we will be making today
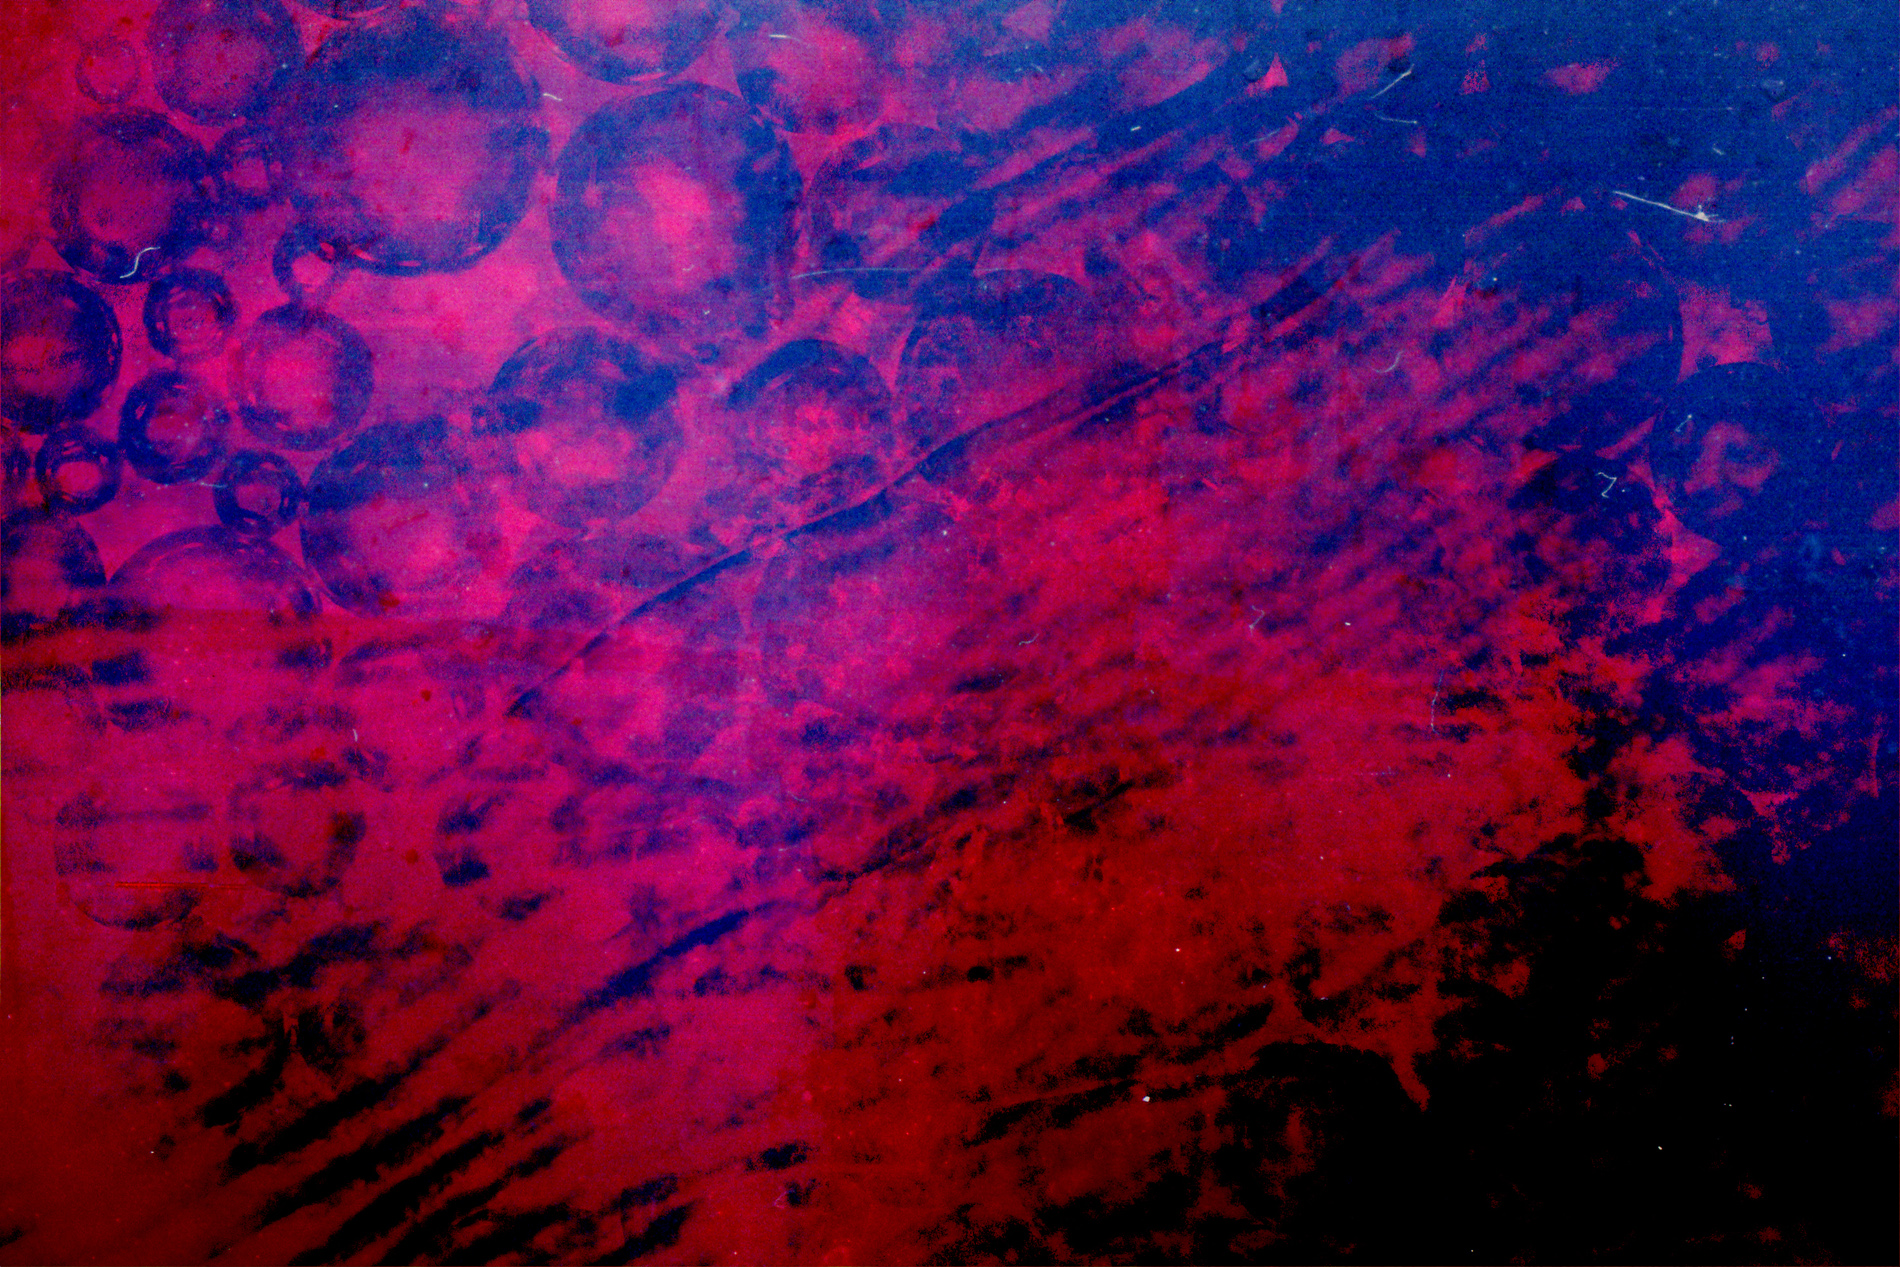
Click the image to view a hi-res version
Before we get started, you ought to do yourself a favor and head over to the Arsenal and purchase the Microscopic Fingerprint Texture Pack.

Let us begin
Our Assets
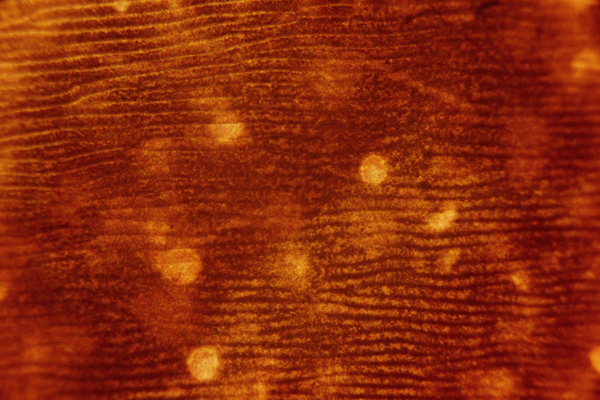
- Microscopic Fingerprints (Texture #1)

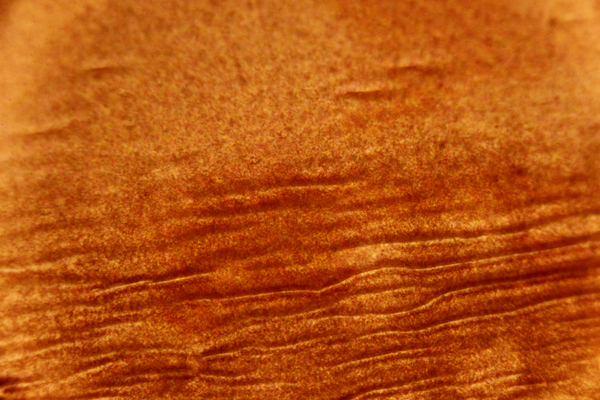
- Microscopic Fingerprints (Texture #3)

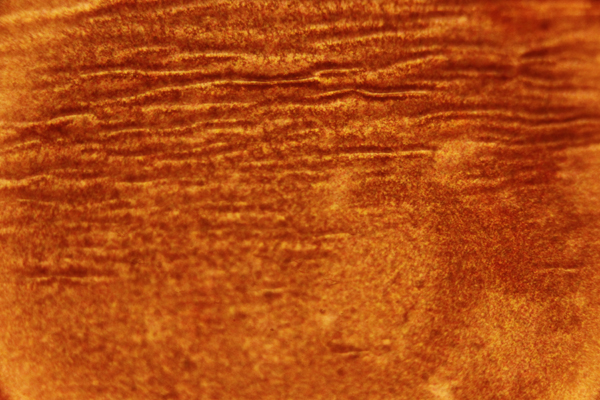
- Microscopic Fingerprints (Texture #11)

- 12 Microscopic Bubble Textures (Texture #1)

- 10 Duotone Grunge Textures (Texture # 8)
- 5 Dynamic Vintage Grunge Textures (Texture #4)

- Textures Shot on 35mm Film: Volume One (Texture #11)

Step One
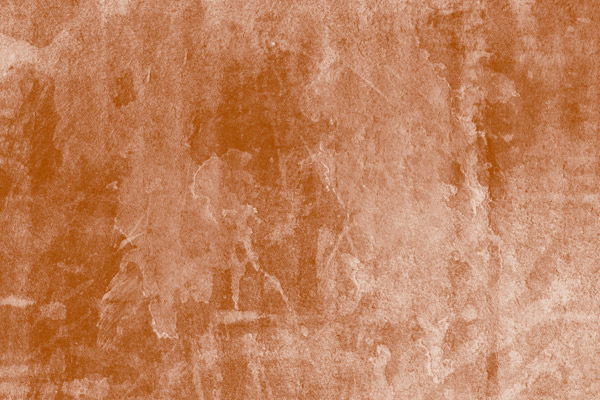
Our Photoshop canvas will be set at 3000px wide and 2000px tall, with a white background (though for this project, the background setting is irrelevant). For our base texture layer, we are going to use the VV_DuotoneGrunge_08 texture, with Blending Mode set at Normal and 100% opacity. No truly discernable elements will shine through on our finished product, but it gives us a solid grunge texture foundation we can build upon.

Step Two
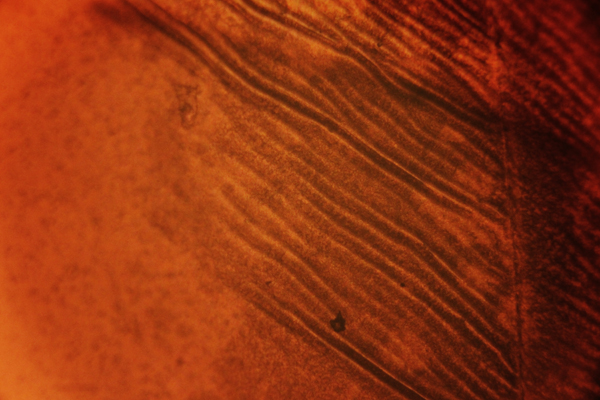
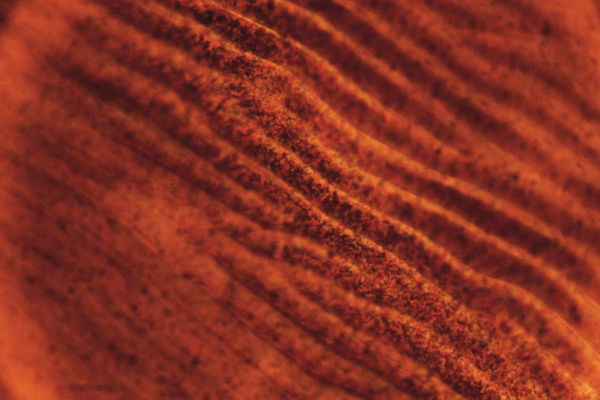
Now from this new Microscopic Fingerprints set, we will drag Texture #1 onto our canvas. Set the Blending Mode to Overlay and leave at 100% opacity. You’ll see that nice grooved pattern in the foreground with some of our base duotone grunge coming through.

Step Three
Next let’s take Texture #11 from this Microscopic Fingerprints set and place it on our composition. Set the Blending Mode to Color Burn and opacity at 50%. You’ll see out composition get a more uniform orange tone, and some of the blacks in the corners become darker. The effects are similar to adding a Curves or Levels adjustment layer. By giving this layer more opacity, you can see how the effect’s potential intensity.

Step Four
Our bubbles layer is getting added to the pot next. Add VV_MicroscopicBubbles_01 to your composition, set the Blending Mode to Overlay and opacity to 75%.

Step Five
The fifth texture we are using is VV_DynamicVintageGrunge_04. Rotate this one 90 degrees clockwise, set the Blending Mode to Subtract, and bring the opacity down to 30%. You’ll see that this texture adds some center-focused grunge elements, minor shadowing to the corners, and brings down the harshness of the orange. We are almost finished!

Step Six
This next step will get us very close to our finished design. From the Microscopic Fingerprints, we are going to put Texture #3 onto our canvas. Set the Blending Mode to Color Burn and leave the opacity all the way up at 100%. We are finally seeing this image get some real attitude and taking on that hardcore grindhouse look.

Step Seven
Finally we arrive at our last step. To finish our piece, we will call on the VV_35mmGrabBagVolumeOne_11. Set the Blending Mode to Pin Light and bring the opacity down a bit to 75%. This 35mm texture gives us that nice gradation of blue into the other red tones, easily adding some more depth and atmosphere to the piece. The bits of film noise also add some subtle effects to the top right corner, adding to the layered appearance of the design.
click image to view hi-res version
We’re done!
You’ll notice that we don’t use a single adjustment layer in our composition. Manipulating blending modes and opacity levels fill all of our needs here.
The piece moves between light color tones and into very harsh deep blacks, with lots of other graphic elements working together to give us our finished design. The diagonal streak effects from our fingerprint textures lay on top of our bubbles and other grunge, creating a feeling of looking through different windows and degrees of degradation.
Have fun experimenting and creating with this new texture set. Feel encouraged to ask any questions and submit any finished work to the Go Media Flickr Pool. Enjoy!